ubuntu 20.04 下安装mysql 8.0.22 并开启远程连接
前两天想把学校做的数据库作业搬到ubuntu云服务器上去,搞了我好久,踩坑太多了,希望记录一下给遇到同样问题的人
以下所有操作在管理员模式下进行,若不在管理员模式下请在代码前加上sudo
第一步 更新所有软件
1apt-get update第二步 安装mysql
1apt-get install mysql-server弹出以下提示
1VALIDATE PASSWORD COMPONENT can be used to test passwords
2and improve security. It checks the strength of password
3and allows the users to set only those passwords which are
4secure enough. Would you like to setup VALIDATE PASSWORD component?
5验证密码组件可用于测试密码并提高安全性。它检查密码的强度,
6并允许用户仅设置足够安全的密码。
7您想设置“验证密码”组件吗? 1By default, a MySQL installation has an anonymous user,
2allowing anyone to log into MySQL without having to have
3a user account created for them. This is intended only for
4testing, and to make the installation go a bit smoother.
5You should remove them before moving into a production
6environment.
7
8Remove anonymous users? (Press y|Y for Yes, any other key for No) : y
9Success.
10默认情况下,MySQL安装有一个匿名用户,允许任何人登录MySQL而无需为其创建用户帐户。
11这仅用于测试,并使安装过程更流畅。在移入生产环境之前,应先删除它们。删除匿名用户? 1Normally, root should only be allowed to connect from
2'localhost'. This ensures that someone cannot guess at
3the root password from the network.
4
5Disallow root login remotely? (Press y|Y for Yes, any other key for No) :
6通常,仅应允许root从'localhost'连接。这样可以确保某人无法猜测网络中的root密码。 1By default, MySQL comes with a database named 'test' that
2anyone can access. This is also intended only for testing,
3and should be removed before moving into a production
4environment.
5
6
7Remove test database and access to it? (Press y|Y for Yes, any other key for No) :
8默认情况下,MySQL带有一个名为“ test”的数据库,任何人都可以访问。这也仅用于测试,应在移入生产环境之前将其删除。
9删除测试数据库并访问它? (按y | Y表示是,按其他任何键表示否): 1Reloading the privilege tables will ensure that all changes
2made so far will take effect immediately.
3
4Reload privilege tables now? (Press y|Y for Yes, any other key for No) :
5重新加载特权表将确保到目前为止所做的所有更改将立即生效。现在重新加载特权表? (按y | Y表示是,按其他任何键表示否):第三步完成后登陆数据库
1mysql -u root -p先查看root的host
1use mysql;
2select user,host from user;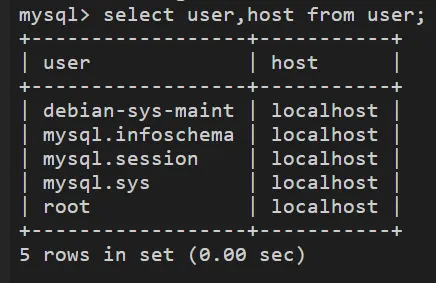
可以看到root的host为localhost即只有本地能够登陆
第四步 修改root的host为% 即无论在哪台主机上都能够登陆
1update user set host='%' where user='root' and host='localhost';第五步 修改加密规则
因为mysql 8.0 之前的版本中加密规则是mysql_native_password,而在mysql 8之后,加密规则是caching_sha2_password,所以如果你的客户端低的话就还原成mysql_native_password,如果不是请跳过此步骤。
1alter user 'root'@'%' identified with mysql_native_password by 'abc123'第六步 刷新权限
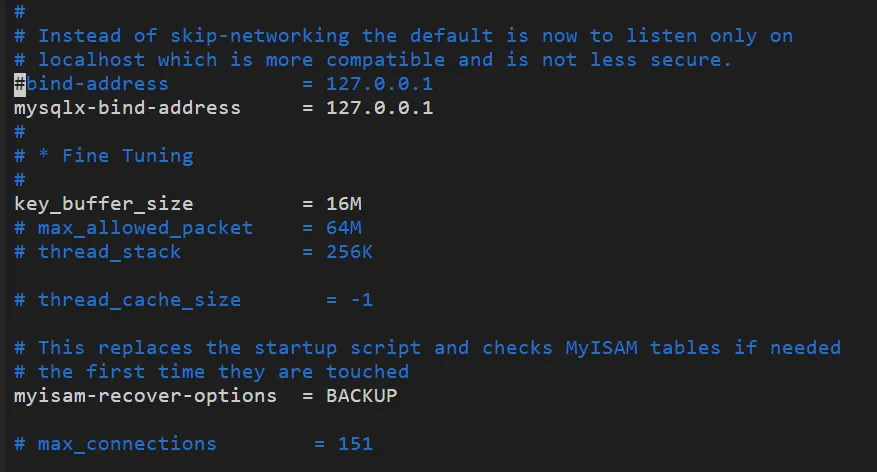
1flush privileges第七步 修改 /etc/mysql/mysql.conf.d/mysqld.cnf 配置文件:
1vim /etc/mysql/mysql.conf.d/mysqld.cnf只需注释掉 bind-address = 127.0.0.1,在前面加#
个人笔记记录 2021 ~ 2025