Web 应用的路由跳转是通过判断 url 的变化来识别的,浏览器根据不同的 url 来选择加载不同的页面资源。现有的路由工具,也都是从不同的角度来解析 url 来实现其功能的。
单页应用 (SPA) 大致有 hash路由 和 history路由 两种路由模式。前者通过识别浏览器自带的锚点来判断资源,后者利用 h5 的 history API,通过解析嵌套子路径来识别资源位置。
Hash
一个完整的网页 URL 包括:协议、域名、端口、虚拟目录、文件名、参数、锚点。其中锚点以 # 开始,一般放在 URL 的最后,其后所有字符串全部都是锚点内容。比如:
https://uswelcome.dadmin.com:80/#/welcome/hello
其锚点部分就是 #/welcome/hello。
我们实现 hash 路由的思路如下:
- 监听页面 hash 变化,拿到新旧路由值及其组件资源
- 卸载旧路由组件
- 挂载新路由组件
- 初始化页面时判断是否带有 hash
浏览器从比较原始的版本就已经支持同页面的锚点滚动:
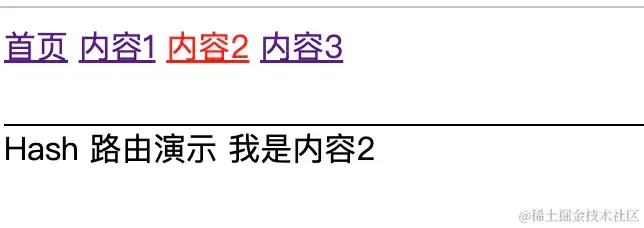
1<header>
2 <a href="/">首页</a>
3 <a href="#content1">内容1</a>
4 <a href="#content2">内容2</a>
5 <a href="#content3">内容3</a>
6</header>
7
8Hash 路由演示
9<section id="content1">
10我是内容1
11</section>
12<section id="content2">
13我是内容2
14</section>
15<section id="content3">
16我是内容3
17</section>
在点击 a 标签时,页面会定位到 id 是该锚点的地方。hash 路由利用了这个使用习惯,但这不是重点,重点是他会触发一个事件:hashchange,每次路由改变都会触发该事件,并提示新旧路由信息(oldURL,newURL),便于框架们进行页面渲染:
1window.addEventListener('hashchange', (e) => {
2 e.preventDefault();
3 e.stopPropagation();
4
5 render(e.oldURL, e.newURL);
6});
为了演示路由组件卸载和挂载,我们加一个过渡的动画:
1header {
2 height: 50px;
3 width: 100vw;
4 border-bottom: 1px solid black;
5}
6
7section {
8 display: none;
9}
10
11.show-router {
12 animation: show 1s;
13}
14
15@keyframes show {
16 from {
17 opacity: 0;
18 }
19
20 to {
21 opacity: 1;
22 }
23}
使用 display: none; 来表示未挂载的组件,挂载后就取消其 display 属性:
1const routerLeave = hash => {
2 const hideDOM = document.querySelector(hash);
3
4 if (hideDOM) {
5 hideDOM.classList.remove('show-router');
6 hideDOM.style.display = 'none'
7 }
8}
9
10const routerEnter = hash => {
11 const showDOM = document.querySelector(hash);
12
13 if (showDOM) {
14 showDOM.style.display = 'unset'
15 showDOM.classList.add('show-router');
16 }
17}
有了挂载和卸载功能后,我们就写一下 render 函数:
1const render = (oldURL, newURL) => {
2 const oldHash = oldURL.split('#')[1];
3 const newHash = newURL.split('#')[1];
4
5 if (oldHash) {
6 routerLeave(`#${oldHash}`);
7 }
8
9 if (newHash) {
10 routerEnter(`#${newHash}`);
11 }
12}
到这里,切换路由时,组件就能正确渲染了。我们将该文件命名为 index.html, 本地启动一个 http-server查看:
组件正确显示,过渡动画也上去了。
现在还有一个问题,就是刷新页面组件丢失,因为刷新页面不会触发 hashchange 事件,我们特殊处理一下:
1window.onload = () => {
2 const hash = window.location.hash;
3 if (hash) {
4 routerEnter(hash);
5 }
6}
到这里,hash 路由的实现就完整了。
History
History 路由实现原理类似,主要是用了 pushState 和 replaceState API 来实现。思路如下:
- 调用 history API 实现路由变化
- 维护路由历史
- 监听路由变化
- 卸载旧路由组件
- 挂载新路由组件
- 初始化页面时设置服务器拦截,引导到 index.html
我们改一下导航菜单:
1<header>
2 <a href="/">首页</a>
3 <a href="javascript:showContent1();">content1</a>
4 <a href="javascript:showContent2();">content2</a>
5 <a href="javascript:showContent3();">content3</a>
6</header>
其中触发的点击事件:
1function showContent1() {
2
3 history.pushState({}, null, "/content1");
4}
此时页面 url 就变化了。但是页面却不会渲染,我们要自己写渲染函数:
1
2const routerStack = [];
3
4const render = () => {
5 const router = window.location.pathname.slice(1);
6 if (router) {
7
8 const routerLength = routerStack.length;
9 if (routerLength) {
10 routerLeave(`#${routerStack[routerLength - 1]}`);
11 }
12
13
14 routerEnter(`#${router}`);
15 routerStack.push(router);
16 }
17}
18
19window.addEventListener("popstate", render);
但是你会发现,在路由切换时不起作用,因为 pushState 不会触发事件。popstate 事件仅在浏览器使用前进/后退按钮或调用 history.back / history.forward / history.go 方法时触发。所以我们需要劫持一下pushState,让他能够触发事件:
1const wrapState = (action) => {
2
3 const raw = history[action];
4 return function () {
5 const wrapper = raw.apply(this, arguments);
6
7 const e = new Event(action);
8
9 e.stateInfo = { ...arguments };
10 window.dispatchEvent(e);
11 return wrapper;
12 }
13}
14
15history.pushState = wrapState("pushState");
此时,我们就可以这样写了:
1window.addEventListener("pushState", render);
当 pushState 的时候,触发渲染,隐藏旧的组件,显示新的组件:

接下来还剩一个问题:原地刷新路由丢失 404 的问题。这个就是老生常谈的问题了,通用的解决方案是配置服务器代理,以 nginx 为例:
1location / { try_files $uri $uri/ /index.html; }
由于是单页应用,只有一个入口,告诉服务器在找不到页面时使用 index.html。
上面代码有很多可扩展的地方,比如在 routerLeave 和 routerEnter 的地方做路由守卫等。
上面的简易实现,没有考虑 hash/router 的复杂情况,没有考虑参数,他只是对第一级 hash 或路由 进行拆分来说明原理,routerStack 也没有清理机制,组件有样式的污染、浏览器兼容处理等。
在具体的 SPA 框架实现时要复杂得多,他是一个统一的入口 <div id="app">,通过路由机制获取到要显示在页面上的资源,最后 app.innerHTML = '资源',在构建资源的过程中,可能需要使用虚拟 DOM,并在自定义的调度周期的特定时刻统一渲染、处理 popstate 异步顺序问题等。