前言
跳过前言:基本使用,您可以选择直接从第二节开始阅读。
提到 React 状态管理,我最初是接触的 Context,就是用 useContext 和 useReducer 去做状态管理,写多了发现还是挺麻烦的,还会出现 “Provider 嵌套地狱” 的问题,对于不同的 state 也不好组合计算。后面了解到 Redux,固有的模式使得用户需要编写很多重复和复杂的代码,甚至开发者也说了 “Try MobX”。对于 MobX,和前者的的函数式编程不同,它采用的是面向对象式的对状态进行管理,我本身并不是很习惯面向对象,这些状态管理库的心智负担,都太大了些。
现在我要推荐今天的主角——Valtio,这是我见过的使我的心智负担最低、需要编写的代码量最少的状态管理库,我本身也写 Vue3,我使用 Valtio 的感受就相当于,用了很久的 VueX,然后遇到了 Pinia!
Valtio 的优点:
- 概念简单,就是一个 proxy
- 文档友好,各种应用场景都有举例
- 使用方式和 API 简单,易于上手和使用,几乎没有什么心智负担…
- 有
devtoolsapi,完美支持 Debug - 当然,完全支持 TypeScript
使用体验下来,简直就是 React 版本的 Pinia 😍
下面,我将类比 Pinia,来讲讲如何使用 Valtio 和管理应用状态。
基本使用
首先使用 Vite 创建一个 React + TS 项目,这个不用讲了。不需要注册,不需要引入一个 Provider 或者 Root 什么根组件来包裹 App 组件,直接新建一个 store 文件夹,然后创建 modules 和 index.ts,如下所示:
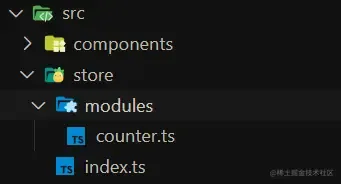
- store:整个应用的状态管理
- modules:存放各个 store,proxy 是自由的,没有约束单一状态源
- index.ts:导出 modules 中的各个store
1
2export * from './modules/counter'
1
2import { proxy } from 'valtio'
3
4export const counterStore = proxy({
5
6 count: 0,
7
8 increase: () => {
9 counterStore.count++
10 },
11
12 decrease: () => {
13 counterStore.count--
14 }
15})
上面的 count 就相当于一个 state,increase 和 decrease 就是 actions,负责对状态进行修改。使用起来也相当简单:
1
2import { counterStore } from '~/store'
3import { useSnapshot } from 'valtio'
4
5export function CompA() {
6 const { count, increase } = useSnapshot(counterStore)
7 return (
8 <div>
9 CompA
10 <div>count: {count}</div>
11 <button onClick={increase}>+</button>
12 </div>
13 )
14}
这里使用了 useSnapshot api,是为了保持 count state 的响应式,这样 Valtio 就会自动追踪更新,然后触发组件的 re-render,当然,这是可选的。
如果你要避免组件的 re-render:
1const { count } = counterStore
如果你仅仅需要 actions 来更新状态:
1const { increase } = counterStore
actions 的更多写法
上面的示例中,我使用了合并 state 和 acions 的写法,Valtio 还支持更多写法,任君挑选。
-
单独分开写法```ts export const state = proxy({ count: 0, })
export const increase = () => { ++state.count }
export const decrease = () => { —state.count }
-
方法合并式写法```ts export const state = proxy({ count: 0, })
export const actions = { increase: () => { ++state.count }, decrease: () => { —state.count }, }
-
this 写法```ts export const state = proxy({ count: 0, increase() { ++this.count }, decrease() { —this.count }, })
-
class 写法```ts class State { count = 0 increase() { ++this.count } decrease() { —this.count } }
export const state = proxy(new State())
计算属性
在 Pinia 中,我们可以直接使用 computed 来基于一个 state 进行计算,结果依然是响应式的。在 Valtio 中,没有直接提供这类 api,但是我们可以使用 subscribeKey 和 subscribe 来订阅某个状态的更新,从而即时的计算属性。
1import { proxy } from 'valtio'
2import { subscribeKey } from 'valtio/utils'
3
4const initialState = {
5 count: 0
6}
7
8export const counterStore = proxy({
9 count: initialState.count,
10
11 double: initialState.count * 2,
12 update: (value: number) => {
13 counterStore.count = value
14 }
15})
16
17
18subscribeKey(counterStore, 'count', () => {
19 counterStore.double = counterStore.count * 2
20})
其中,subscribeKey 用于 primitive state(原始值类型),subscribe 用于引用类型(这里一般指 plain object)。
当然,你也可以不指定订阅某个状态,而直接使用 watch api,Valtio 会自动追踪依赖值。
1watch((get) => {
2 get(counterStore)
3 counterStore.double = counterStore.count * 2
4})
状态组合
需求:在一个 store 中来使用另一个 store。
在 Valtio 中,状态组合也非常简单,直接引入使用即可,如果是在不同文件中的 store,则需要进行订阅更新。
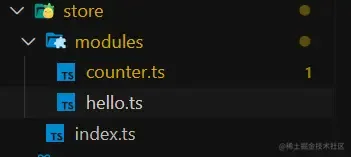
我们新建一个 hello.ts:
1
2
3import { counterStore } from './counter'
4import { watch } from 'valtio/utils'
5import { proxy } from 'valtio'
6
7const initGreet = 'hello counter'
8
9export const helloStore = proxy({
10 greets: Array.from({ length: counterStore.count }, () => initGreet),
11 add: (value: string) => {
12 helloStore.greets.push(value)
13 }
14})
15
16
17watch((get) => {
18 get(counterStore)
19 helloStore.greets = Array.from({ length: counterStore.count }, () => initGreet)
20})
功能:上面代码中,每次 count 更新的时候,greets 都会更新,计算关系为 greets 数组长度等于 count,每个元素都是 'hello counter'。
1greets.length === count
数据持久化
得益于 Valtio 的自由和简洁,你完全可以使用现有的 api 做到这点,基本思路是订阅某个你需要持久化的 state,然后检测到更新到时候,即时的存一下 Storage 即可,每次获取的时候就从 Storage 中获取。(仅需要两行代码)
Storage 可以是 localStorage 和 sessionStorage
示例代码:
1import { proxy } from 'valtio'
2import { subscribeKey } from 'valtio/utils'
3
4const initialState = {
5 count: 0
6}
7
8export const counterStore = proxy({
9
10 count: Number(localStorage.getItem('count') ?? initialState.count),
11 double: initialState.count * 2,
12 update: (value: number) => {
13 counterStore.count = value
14 }
15})
16
17subscribeKey(counterStore, 'count', () => {
18
19 localStorage.setItem('count', counterStore.count.toString())
20})
21
22
23watch((get) => {
24 get(counterStore)
25 counterStore.double = counterStore.count * 2
26})
历史记录
历史记录?没错,Valtio 还支持状态的回退和前进,因为 Valtio 保存了状态的每一个 snapshot(状态快照),我们可以使用 proxyWithHistory 来创建一个可保存历史状态记录的 proxy,该方法创建的 proxy 暴露了 undo 和 redo 方法能让我们对状态进行回退和复现,相当于 ctrl z 和 ctrl y。
1import { proxyWithHistory } from 'valtio/utils'
2
3export const counerStore = proxyWithHistory({
4 count: 0,
5 increase: () => {
6 counerStore.value.count++
7 },
8 decrease: () => {
9 counerStore.value.count--
10 }
11})
使用的时候主要这里需要使用 .value 来获取 state 和 actions。
1
2import { useSnapshot } from 'valtio'
3import { counerStore } from '~/store/modules/counter2'
4
5export function CompC() {
6 const counter = useSnapshot(counerStore)
7 const { count, increase } = counter.value
8 return (
9 <>
10 <div>{count}</div>
11 <button onClick={increase}>+</button>
12 <br />
13 <button onClick={counter.undo}>undo</button>
14 <button onClick={counter.redo}>redo</button>
15 </>
16 )
17}
devtools debug
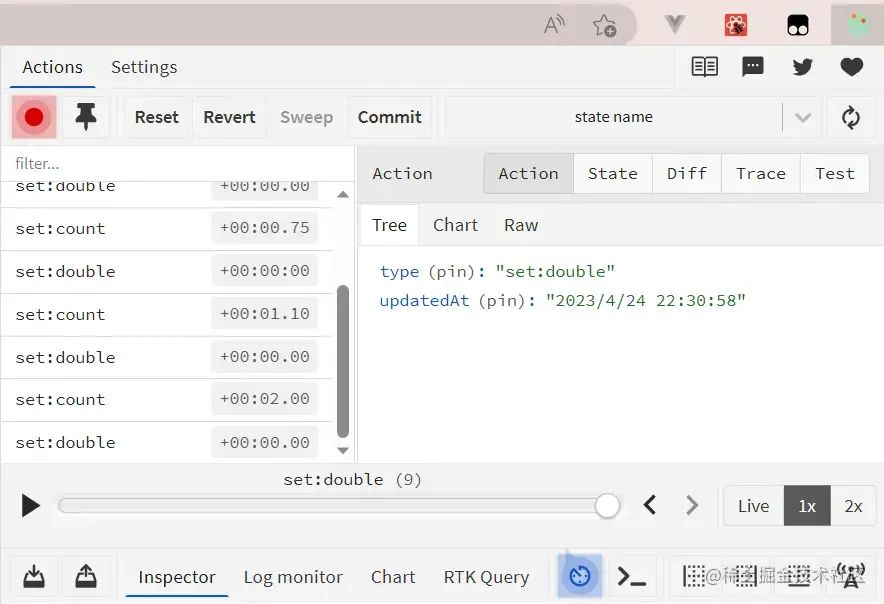
我们知道,pinia 支持使用 vue devtools 进行状态的追踪和 debug,那么我们的 Valtio 也支持 redux devtools。
下载好 redux devtools 插件后,在代码之加入下面这一行代码,即可轻松开启 debug:
1devtools(counterStore, { name: 'state name', enabled: true })
一切都是那么的自然,几乎没有什么学习的负担,文档友好,api 简单,仅 3.1 kb 的库,赶快使用它来提升你的开发效率吧!(●’◡’●)
更多请参考官方文档:Valtio, makes proxy-state simple for React and Vanilla